Wednesday, November 27, 2013

Java Sugar Scrub

HEY!
Yeah, it's getting there. That," OMG school is killing me, when is break?!"
Or, "these kids are driving me crazy, I don't know how many more school projects I can glue together before I pull my hair out!"


So whats a thrifty chick to do?
Take a damn minute and pamper yourself!

Good God no not that.


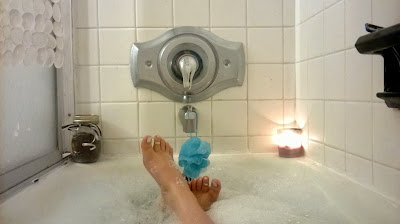
I mean treat yourself. Even if it's just a bubble bath with some music and a strong drink, you DESERVE IT!
So here's a little something to make just for you (also makes a great gift!)
Java Sugar Scrub:
1/2 cup coffee grounds (Folgers will do you guys, don't use your ten dollar a bag starbucks for this)
1/2 cup of regular old white sugar (you can use raw if you like, just don't use brown sugar, too lumpy)
baby oil
a pinch of cinnamon if you would like

In a bowl, combine your sugar and coffee (just to reiterate, this is right from the bag, don't use already brewed coffee grounds!)
then add a pinch of cinnamon, if you would like.
Then stir well.
Once you have your dry ingredients mixed, add baby oil, one tablespoon at a time,and mix well until you get your desired consistency. I ended up adding about 3, and it came out not too oily, but a nice "fluffy" consistency.

Again, I would like to point out that in some recipes I've seen call for coconut oil or olive oil. Olive oil is ok, but I would steer away from using coconut oil in this recipe, as it does not stay liquid, and could clog your drains. Also, the baby oil and the coffee together make quite a lovely smelling combination.
You can put it in a nice little jar, and if you want to gift it, just add a ribbon! Boom! There ya go.
Now go enjoy it!
<3 Rach

SIDE NOTE: after using this, I've noticed a lot of redness leaving my skin! Plus it's great for a groggy morning shower! :)

Monday, October 7, 2013

DIY Shaving Lotion

Yo!
I know winter is coming, and if you are like me, you say to hell with shaving and wear jeans/leggings.
BUUUUUUT, winter dries out my skin something terrible, and I never put on lotion, 'cause I'm fucking lazy.
Also, I'm broke as hell this week, and ran out of shaving cream. And I really don't like using Boyfriend's Barbasol.


So what's a thrifty chick to do?
Cruise Pinterest and make some shit yourself!

I found this pin: http://www.pinterest.com/pin/44402746299194354/
I'm a pretty skeptical chick, (ahem, cynical), so I was like, shampoo and conditioner with baby oil and lotion. Nope. I call bullshit.
but ya know what? It's pretty fantastic.

What you will need:
1 cup of your choice of shampoo
1 cup of conditioner
5 Tablespoons of lotion
5 Tablespoons of baby oil
A big bowl
and something to put it in when done. (I used an old water bottle. Don't judge me).

First, pour a cup of shampoo, and a cup of conditioner in the bowl.


 Then add your baby oil, and lotion.
Baby oil, made from fresh babies.


 Mix Mix Mix! Then, let it chill out on the counter for about an hour. Then place it in a container for your shower and it's ready to use!
Shave Soup
Mine came out a little thin. You can play with the consistency if you would like. I'm sure it also depends on the products you used. I've seen recipes for this using coconut oil instead of baby oil, but coconut oil tends to get hard in cold water, and I don't want to clog my drains. But feel free to experiment! Try different lotions and shampoos and see what you come up with!
I really like this. My skin is very sensitive, and even using this with my old crappy razor worked like a charm!
<3 Rach.

Tuesday, September 17, 2013

Hey old friends!

Hey Everyone! Rach here!
Been a while huh?
Well, we have both been busy busy busy!
Hopefully now we can really get back in the swing of things and make it happen Captain!


Anywho, I've got some great stuff in store for you guys, and so does Elyse!
So lets get back into with a double post!
So Halloween and other holidays and football season are surely approaching, and you know what that means.
People are going to be coming by your house, drinking and expecting you to feed them.
So here's a "whats in my fridge" Dip.
You will need :
this crap.
Salsa
Sprinkle Cheese
Jalapenos (optional if you're a little bitch)
Cream Cheese
Sour Cream
Some sort of ground meat (i used lean beef)
Chances are you have most of this laying around your house.
Fry up your burger (feel free to add taco seasoning)
That's hot. No, really, that's fucking hot.
Throw that shit in a bowl.
Then add some of your other crap.

Stir said crap.
Serve with some tortilla chips, and there you have it. Good for holidays, football games, just stuffing your face in general, you get the idea. And it was made with stuff that you just have lying around your house!

So, now naturally, you are going to need something to drink!
How about a salted watermelon slushie?
If you are like me you probably have a bunch of leftover watermelon from summer festivities, bbq's and what have you.
So grab your vodka and come with me!
You will need:
A watermelon, seeded and cubed
Vodka of your choice
ice
a lime (or lime juice)
grapefruit juice
some sort of blender,
and some salt to rim the glass is optional, but recommended for sheer tastiness.

First, add vodka to blender
One shot, two shots, who cares? 

Add in watermelon cubes, and a splash of lime and grapefruit juice, and a handful of ice.
Insert blender noise here.
(and yes, my washing machine is in my kitchen. I don't have water hookups all willy nilly through my house, ok?)
Take a glass, and rub the rim with lime, then rim with salt just like a margarita. Except without the tequila because we all know what happened last time you had tequila. (Shame on you).
Yeah, I'm sure this is exactly what my great grandmother was intending her china be used for. 
And you pour that pink slushie deliciousness in that cup and then right down your gullet.
Great for the ladies ignoring the on going game, or, those enjoying it.
Hope you enjoy your yummy dip and slushie, and I'll be seeing you bitches again sometime later this week!
<3 Rach

Thursday, September 5, 2013

wait...wtf.....

Oh that's right! I have a blog!

Sorry everyone who might have been looking on here patiently awaiting our next awesome post.
We had to take a break, due to our really really hectic schedules and school. Yep, we have other shit to do that craft and drink sometimes, but we are trying to get it out of the way :) So......we are going to plan our next posts, then put them up. And the good news is....it is almost fall!!!!! Which happens to be my favorite season for the simple fact that it has Halloween in it. And everything horror rocks mah socks. So, stay tuned, and we WILL I repeat WILL deliver. Thanks to all of you who have stuck it out. Those that didn't can go fuck themselves.
Kindly,
Elyse

Friday, June 28, 2013

Make a Better Teapot, and Don't Murder Everyone

Hey guys, it's Elyse. I'm going to start this one out by saying that this craft is intended to fill those hours when you are steaming angry, and ready to punch someone.
good god, best gif i have seen in a while
Why? Because it involves painting. Painting anything, doesn't matter what, or how, to me is therapeutic. So this craft is all about taking someone (sorry, SOMETHING) you hate, painting it, then sticking it in the oven to have it come out pretty and new.

When I first moved in with the man that is now my husband, he had an awful teapot that his previous wife (cough, bitch) had left with him. I'm sure after you see this picture, you will understand why. But for this craft, any old ceramic object from the thrift store with a god-awful print will work to soothe your soul. 
Fucking blue leaves...this has disturbed me for 3 years.
The list of things you will need for this craft is small...
1. Any ceramic object you really would love to throw out of your moving car, but are too frugal to do anything like that. 
2. Enamel Paint. This can be found at your local Walmart. (That's right...the store everyone hates to love.)
3. Paint brushes. Don't be stupid. You will not finger paint this. 
4. Oven. If you aren't incarcerated, or in some work camp, you probably have one. 

I chose teal, because I wanted Rachel to be jealous. And I painted the lid red, because there is something almost orgasmically satisfying about bright contrasting colors. 
Step 1.... PAINT!!!! It really is that easy folks, now you will have to do at least 2 coats, because if there is a print at all, or sometimes if there isn't, there will always be brush strokes through that shit. Enamel paint is no perfect substance. 
Ugliness will prevail, even through thick-ass paint. 
Stand your ground, give it some time, and do as many layers as you need. Also, for a smoother look, you will need to make sure there are no clumps, or thick parts, as this paint is like perfect mud-wrestling consistency. (mmmm...sexy)
The red is not so MERICA colored, as it looks in this photo. 


Then, once you are all painted up, stick that shit in a cold oven. Yep, cold. Then, preheat to whatever your bottle of paint says, and leave in for the time instructed. Let them cool in the oven, then you are golden!
This stuff is the best, you can put your painted lovelies in the dishwasher, or hand wash them, use it however you want. IMPORTANT!!!! This paint is not meant for surfaces that touch food or drink, as it may flake or something. IDK, that's what it says on the bottle, but i'm a rebel, because I couldn't leave the inside of the teapot spout unpainted. Hooray for poisoning guests (UN?)intentionally!!!! Now make yourselves a tea wreath from Rachel's post, and you will be two steps shy of being Martha Stewart. (House arrest not included)Hopefully by this point, you have forgotten whoever cut you off in traffic, or spilled your martini. Obviously Martha Stewart didn't paint enough. Although, haven't we all been tempted to be found guilty of insider trading and be on house arrest in our mansion full of crafts? Here it is all done....


Thursday, June 20, 2013

Dirty Mouth Martini

Hey everybody!
It's Rach.
And it's time for the cocktail of the week.
Yep.                                                                                                                                                                                                                                                  

And this week is The Dirty Mouth Martini.
What's salty, dirty and full of vodka?
ME!
Haha just kidding. It's this drink.
So grab you a martini glass and get ready to feel fancy.
You will need:
-A martini  glass
- Some sort of vodka (i suggest a nicer vodka. I like Stoli)
- A jar of olives with juice. ( no pits)
- toothpicks
- ice
-shaker (you could prob find these at any goodwill, if not, just use something with a lid, like a mason jar)
The Avengers. Fighting Sobriety.
Fill your martini glass with ice, and water. and let sit for a minute to get the glass nice and cold.
When a frost forms on the glass, dump it out.
Olive Juice...Olive juice you too!
In a shaker of ice, pour a about a shot of olive juice, to two shots of vodka.
(depending on your vodka, and how much you like olive juice. You may have to experiment ratios to get something you like).
You say potato, I say vodka


Because what's cooler that being cool? ICE COLD!!!


Now shake it like a polaroid picture.
Seriously, shake the crap outta it. The harder you shake, the colder the mixture gets, and little ice crystals end up in it. SO YUM.
Once you are satisfied with your shaking, strain it into your martini glass.
Looks like my vitamins and pepper shaker are getting awfully chummy...
 Garnish with three olives. Three. Why three? Because I fucking said so.
Once garnished. Take it to the face. Like a sir.
Now these drinks are STRONG. So imbibe responsibly.
So enjoy your Dirty Mouth Martini, and pretend like you are in Mad Men.
Too many of these you may start to salute your wall art. :)
<Rach.

Wednesday, June 19, 2013

DOUBLE CRAFT!

Hey it's Rach.
And to make up for the slackness that is me, I'm posting a DOUBLE CRAFT.
That's right. Two crafts for one. Its a long post so I'll shut up and start the crafting.

Because I'm a BAWS.
First Craft:
Home Sick Buddies Tea Mugs.
Elyse lives in Utah, and I live in South Carolina. Hence this long distance blog, we thought this would be a good way to keep in touch, and to share crafts with each other, and the rest of you awesome crafty bitches.
So I came across this awesome mug tute on Pinterest of all places.
Long Distance BFF Mugs
How cute! And since Elyse will be here next month, I am in the process of making her awesome things. I AM SUPER EXCITED.
So I went to Walmart and the Dollar Store.
Hate Walmart, Love the Dollar Store (the everything one dollar store).
But the Dollar Store does not carry Metallic Sharpies.
I digress.
So I went to Walmart and grabbed some Metallic Sharpies. (I used Metallic, because I was using black mugs)
Then I went to the Dollar Store and grabbed two plain mugs for a buck apiece. SWEET.
TWO BUCKS.

So then I got my sharpies together, and printed out an outline of each of our states.
Then I cut out the states right on the outline.
Utah and the "triangle of boredom"
Elyse, who knew your state was so...geometric.
So I positioned each of the cutouts on their own mug, and traced.
Seriously, when I googled "utah outline", I was like, "Bullshit".
Then I went over to the Hot Box, (oven) and preheated it to 350.
I finished the state outlines, and put whatever the fuck else I wanted on it.
Utah

South Carolina

The one with my state goes to her, and the one with her state goes to me.
So every time we enjoy a hot drink, and see the little hearts, (where we live), and go, I MISS THAT CRAZY BITCH.
So I pop 'em in the oven for 45 minutes. After 45 minutes, I turn off the oven, and let them cool in there.
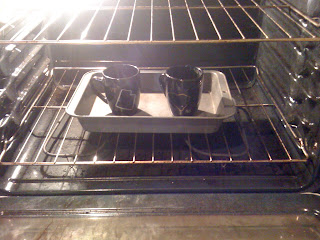
Shine bright like a DIAmond.
And then, when cool, you take em out, and there you go. You can use them AND wash them and the sharpie will not come off ! How cool! And you don't have to just make these, get creative!
They make fantastic gifts!
---------------------------------------------------------------------------------------------------------------------------
Now on to craft number two.
Elyse and I were having a conversation the other day about tea, like you do.
We are both the kind of people who have a plethora of teas in our house at all times. Even me, and I like to think of myself as a java chick. But sometimes you just want a cuppa hot tea. Good for what ails ya and what not.
We both have a TON of tea. Elyse says the husband is constantly asking her what teas they have, while making a mess of the kitchen, and I myself wonder what teas I have, also whilst making a mess of the kitchen.
Not to mention Elyse's parents, who have a better variety of teas then most grocery stores I've ever been in. No lie.
 Then I came across this.
A tea wreath!
A great way to display all the teas you have, without having to constantly rummage through your cabinets, and great for guests! (also gifts)
And its really cheap to make. Like I made two for 6 bucks out of pocket, and had stuff left over.


A tea wreath. An attractive way to display your variety of teas.
But when I think of wreath, I think of an actual wreath, not a circle of cardboard, not that anything is wrong the those. They are very adorable. But I had an idea.
First, get you:
A wreath, or two
 
One dollar apiece. 
Then a glue gun with plenty of glue sticks, obviously. Dog not included.
Bowie in disbelief!
Also, a package of clothes pins. Just regular ole clothespins. Also a buck.
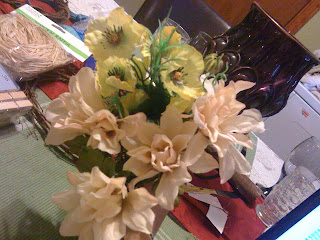
Flowers!
You will need some silk flowers in any color you would like, I got these from the dollar store as well. (This is quickly turning into a dollar store craft).
I don't know what color Elyse's kitchen is so I got peach like her hair, and yellow, because my kitchen is yellow.
Optional is a shit ton of raffia. Feel free to use ribbon. This shit was a mess. Got it from the dollar store...of course.
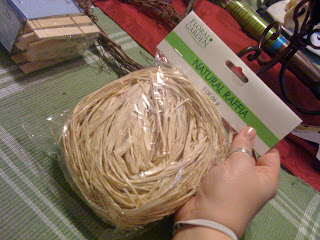
A friggin mess...
 So figure out about how many clothes pins you are going to need, depending on the size of your wreath.
Leave a gap at the top for ribbon and flowers, and ribbon to make some sort of loop to hang it.
Then start to carefully glue on your clothes pins with the part that opens (the mouth) facing out! or else you tea wreath is gonna look hella dumb. Seeing as the wreath is uneven, you might need to hold the clothes pins and use plenty of glue. BE CAREFUL WITH THE GLUE GUN.
Once you have all your clothes pins on FACING OUT! Start adding your embellishments. Get creative!
Just pop em right off the stem, and stick em on. 

Don't be afraid to use the green parts too!!

Add you a bow. Classy.
Glue some sort of loop on the back to be able to hang your wreath. Make sure it's strong enough to hold your wreath with tea on it.
So now lets rummage up some of my tea...
Here....

And here.
and look....
more tea.
Clip them on your wreath, and hang it!
Super cute. For six bucks I had enough to make two of these, if you have a glue gun and packaged tea on hand! They make great gifts, and they are adorable. Get creative! Use your favorite colored flowers and ribbon, and as cheap as they are to make you could make different themed ones for different holidays!
Whew. That was a long post. I'm going to have some wine. This is Creating Under the Influence after all.
Buy Stark Raving Cab here.

Oh and here's the other wreath!


 <Rach.